PinePhone Pro (Single Page)
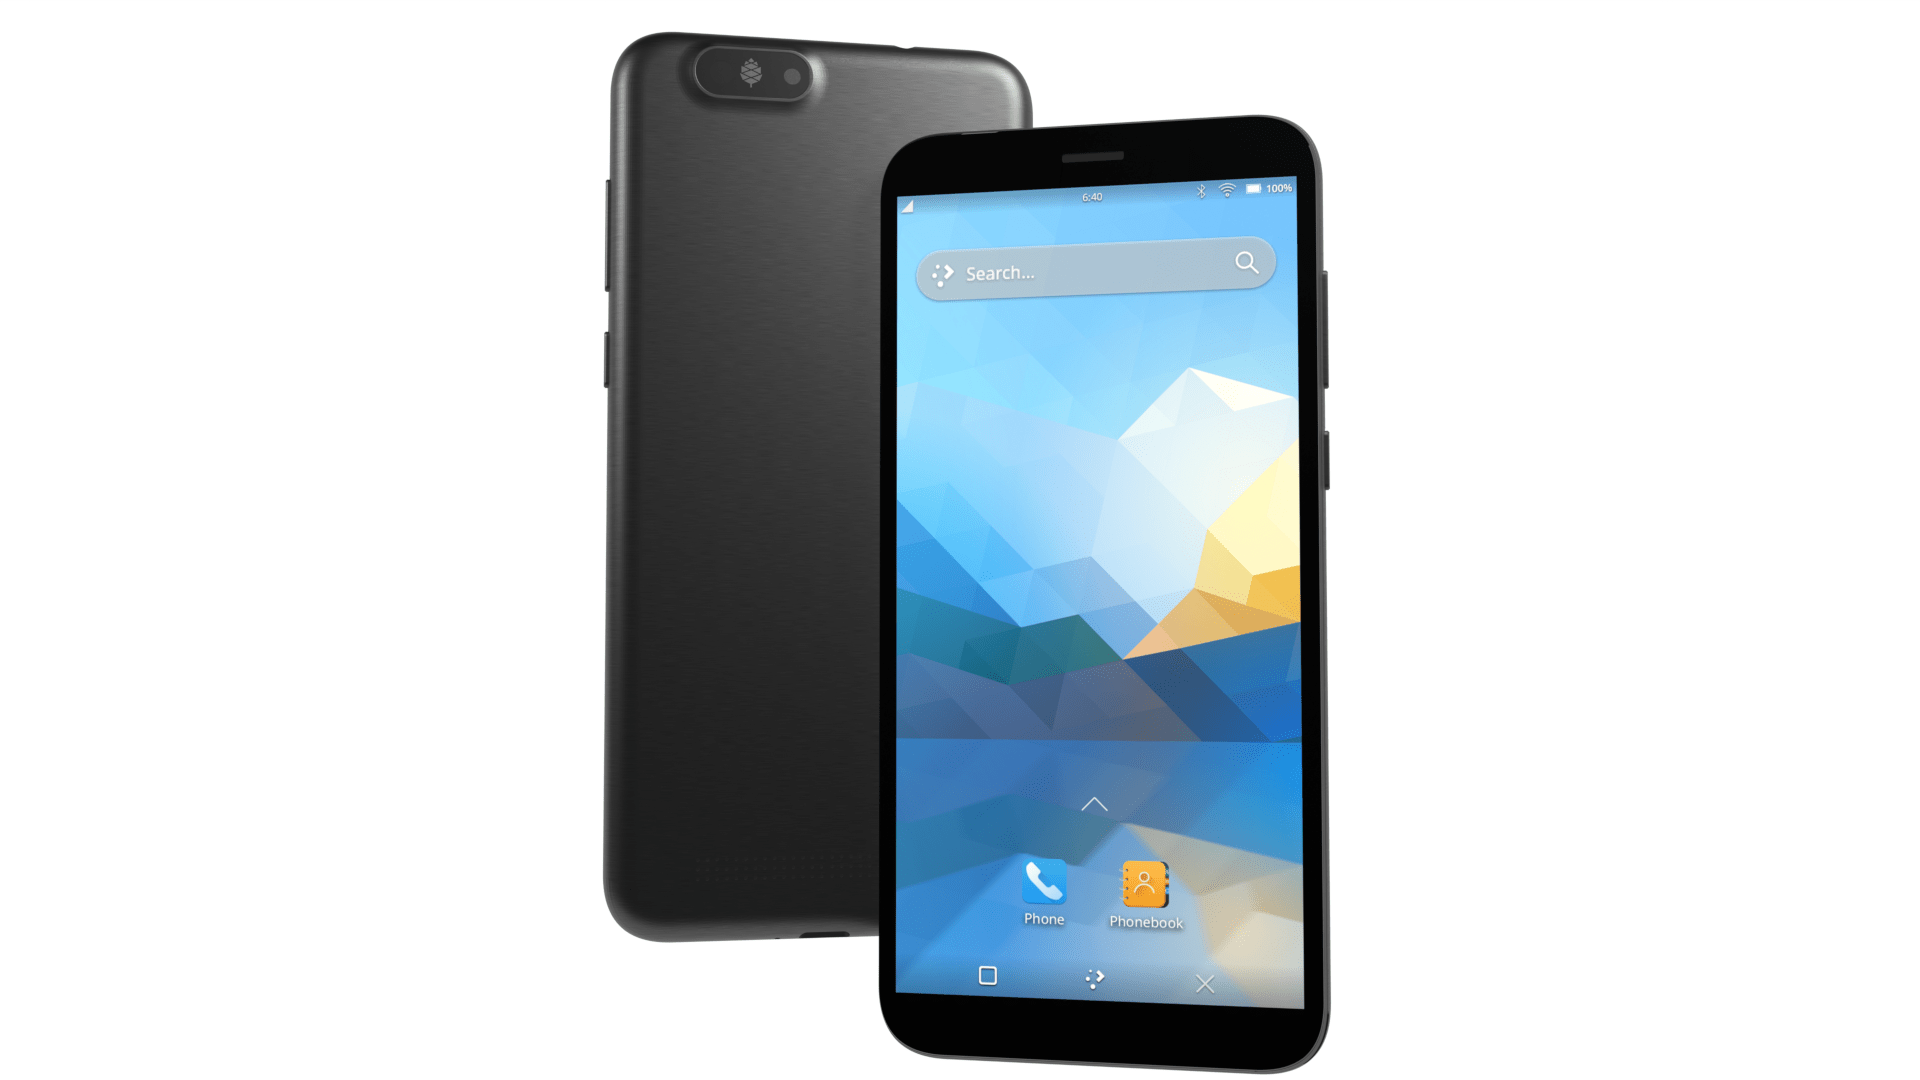
The PinePhone Pro is PINE64’s flagship smartphone announced on October 15, 2021. It features 4GB of RAM, an 128GB eMMC and is using an Rockchip RK3399S SoC, which is a specialized version of the RK3399 made specifically for the PinePhone Pro.
Introduction
The PinePhone Pro is PINE64’s second smartphone and a successor to the original PinePhone. It does not, however, replace the original PinePhone. It should also not be considered a second generation PinePhone; it is a higher-end device, with much better specs, aimed at those who wish to daily-drive a open system stack. Achieving this goal will, however, take time as the software and overall smartphone software ecosystem needs to mature.

Editions and revisions
Similarly to the original PinePhone, various PinePhone Pro editions are planned, the first of which is the Developer Edition (aimed at developers, as the name entails) followed by the Explorer Edition, which is aimed at early adopters.
- Developer Edition
- Explorer Edition
Help and support
Still have any questions regarding software, shipping, or ordering after reading the documentation? Please don’t hesitate to contact the community in the bridged community channels for detailed answers or simply to chat with friendly people in the community! See Main Page.
Please keep in mind that PINE64 is not like a regular company (see the PINE64 philosophy) and that support resources are limited - the best way to get support quickly is to ask in the community chat! Please only contact the PINE64 support directly if questions couldn’t be solved via the community chat or the documentation.
First time setup
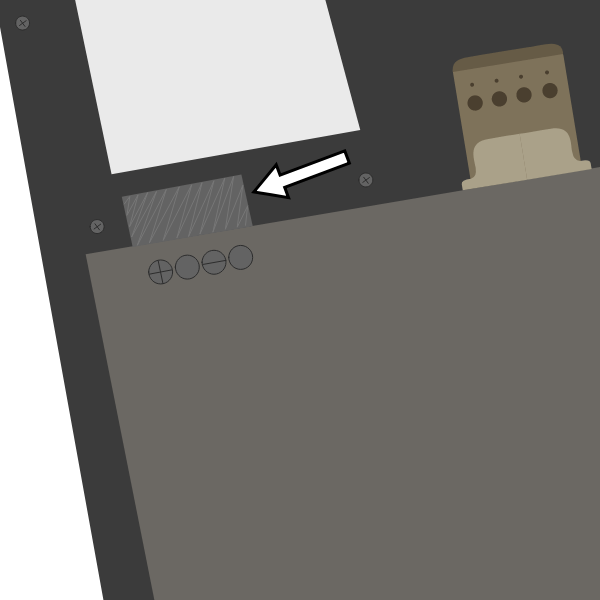
A protection foil isolates the battery for the shipping.
When shipped the battery is isolated from the device using a protective plastic tab, which is required to be removed before using the phone. The battery will not charge or boot until it is removed and the battery is connected again.
The SIM card has to be placed in the lower slot, while the microSD has to be placed in the upper slot. Devices shipped after the end of July 2022 do only accept a nano-SIM, the SIM is inserted into a carriage released by slightly pulling on the handle in the lower slot (for information regarding devices shipped prior to end of July 2022 see below).
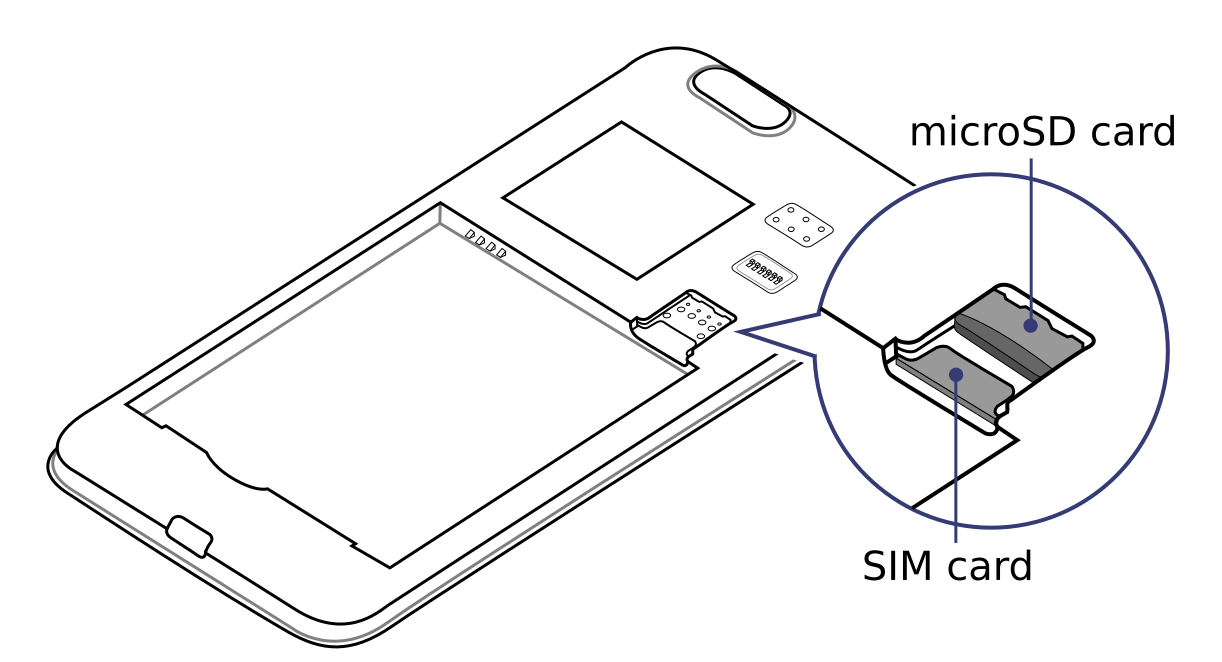
The microSD belongs in the upper slot, the SIM card in the lower slot.
Software
Boot order
The RK3399S processor in the PinePhone Pro searches for the bootloader (such as U-Boot or Tow-Boot) in the following order:
- SPI flash
- eMMC (the internal memory)
- MicroSD card
Boot from microSD card temporarily
To temporarily boot from an inserted microSD card do the following:
- On the Explorer Edition ordered after November 2023 the microSD card is first in boot order due to using rk2aw instead of Tow-Boot, see here. A boot menu can be opened by holding power at boot for not too long.
- On the Explorer Edition ordered after July 2022 hold the volume down key while powering on the device. The batches bought after July 2022 come with Tow-Boot flashed to the SPI, which offers additional functionality over U-Boot as bootloader.
- On the Explorer Edition ordered between January and July 2022 hold the RE button underneath the cover for a few seconds, while powering on the device. If the button is labeled RESET instead of RE please verify if the device is a regular PinePhone (or the Developer Edition). This is required because older batches don’t ship with Tow-Boot on the SPI. Flashing Tow-Boot can be caught up by following this instruction. Note: If Tow-Boot is flashed later, the microSD card can be selected at boot with the volume down key as well.
- On the Developer Edition (sold to selected developers only) the SPI and the eMMC can be bypassed by shorting the bypass test points while booting. The process is explained in the article PinePhone Pro Developer Edition. Please join the community chat for any questions regarding the process.
The RE button disables the SPI and the eMMC at the hardware level while the button is held and the PinePhone Pro will try to boot from the next available boot medium, which is the microSD card. Note: When holding the RE button (or when shorting the contact points in case of the Developer Edition) for a longer time at boot the operating system will not initialize the SPI and eMMC and it will not be possible to write to these storage mediums until the next reboot.
Boot from microSD card permanently
The bootloader (such as U-Boot) resides in the free space in front of the first partition. Wiping the bootloader from the eMMC to make the PinePhone Pro boot from microSD card can be done using sudo dd if=/dev/zero of=/dev/mmcblk2 seek=64 count=400 conv=fsync. Formatting the drive or deleting the partition table is not sufficient to wipe the bootloader.
Installation instructions
The software releases can be installed (the process is being referred to as flashing) to the internal memory of the PinePhone Pro (the eMMC) or to an microSD card.
Installation to the microSD card
The images can be installed to an microSD card and be booted from it.
The microSD belongs in the upper slot, the SIM in the lower slot.
To install an image to the microSD card:
- Download a compatible image from Releases.
- Important: Typically the image will be compressed in an archive file to reduce the download size (such as .gz or .xz). Extract the image from its archive file to get the file with the file extension .img.
- Write the image to your microSD card using your favorite method, examples:
- Using dd: On the device you’re flashing the microSD card from, find the correct device under
lsblkand then flash the image to the microSD card usingsudo dd if=IMAGE.img of=/dev/[DEVICE] bs=1M status=progress conv=fsyncand make sure the target is the whole microSD card and not its first partition, sdc1 or mmcblk0p1 are wrong! - Using bmaptool: Make sure to select the correct device using
lsblk. Then run bmaptool with the correct device: Download the IMAGE.xz and the IMAGE.bmap files, then runbmaptool copy --bmap IMAGE.bmap IMAGE.xz /dev/[DEVICE]. This takes around 2.5 minutes to flash a 4 GB file. - Using a graphical tool: A graphical tool such as Gnome Disks under Linux or Etcher under Windows may also be used.
- Using dd: On the device you’re flashing the microSD card from, find the correct device under
- Insert the microSD card into the top slot of the PinePhone Pro
- Boot the device using the following method:
- With rk2aw (as on the Explorer Edition ordered after November 2023): boot the phone without any further action if the image includes a bootloader or one is installed to the eMMC (such as in the default installation).
- With Tow-Boot (as on the Explorer Edition ordered after July 2022): hold the volume down key while booting.
- With an empty SPI (like on the Explorer Edition ordered between January and July 2022): hold the RE button underneath the back cover while booting (or use the volume down key if you flashed Tow-Boot).
- On the Developer Edition (sold to selected developers only) there is no RE button. Instead apply the bypass by shorting the testing pads while booting according to the datasheet.
Installation to the eMMC
Installing an operating system to the eMMC (the internal memory of the PinePhone Pro) can either be done by booting an operating system from the microSD and by installing to the eMMC directly from the booted microSD card operating system (recommended) or by using Tow-Boot’s USB Mass Storage mode.
By booting a microSD card
The eMMC can be overwritten by booting an image from the microSD card and overwriting the eMMC from within that booted microSD card image.
This installation method is recommended.
- Boot an operating system from the microSD card. If there is already a bootloader on the eMMC installed see the section Boot order to bypass it.
- Download or copy the desired image to the microSD card as file
- Check if the eMMC appears under
lsblk. If it doesn’t appear in the output of the command, the eMMC wasn’t initialized due to applying the above explained bypass method for a too long time during the boot - Important: Typically the image will be compressed in an archive file to reduce the download size (such as .gz or .xz). Extract the image from its archive file to get the file with the file extension .img.
- Flash the image file using
sudo dd if=IMAGE.img of=/dev/mmcblk2 bs=1M status=progress conv=fsync(replace IMAGE.img with the filename of the image you want to flash and make sure it has the file extension .img). - Reboot the PinePhone Pro
By using Tow-Boot
The image can be written to the eMMC by using Tow-Boot’s USB Mass Storage mode.
This installation method is not recommended, as the USB connection can be unreliable and in some cases not work at all.
- Pre-requirement: Tow-Boot must be installed on the SPI, eMMC or the microSD card
- Power off the device
- Power on the device and hold the volume up key before and during the second vibration
- The LED will turn blue if done successfully. This will only work if Tow-Boot is installed
- When connecting the device to a computer via USB it will behave like an USB drive now
- Check if the eMMC appears under
lsblk, the output might look like the following:mmcblk2 179:0 0 115.2G 0 disk├─mmcblk2p1 179:1 0 122M 0 part /boot└─mmcblk2p2 179:2 0 115.1G 0 part /
Note: In this example, /dev/mmcblk2 is the device, while mmcblk2p1 and mmcblk2p2 are partitions of the device. The downloaded images are images from full devices, which means that the full device (mmcblk2 in this example) needs to be flashed. Ignore the partitions! - Important: Typically the image will be compressed in an archive file to reduce the download size (such as .gz or .xz). Extract the image from its archive file to get the file with the file extension .img
- Flash the image file using
sudo dd if=IMAGE.img of=/dev/DEVICE bs=1M status=progress conv=fsync(replace IMAGE.img with the filename of the image you want to flash and make sure it has the file extension .img and replace DEVICE with the correct device from the lsblk command) - Reboot the PinePhone Pro
Releases
This page contains a list of all available software releases and tools for the PinePhone Pro.
Factory builds
These are two operating system builds that was preloaded in the factory with testing utility.
Download the build, extract the image and dd it to a 8 GB or larger microSD card, then insert it into the PinePhonePro. Press “RE” button for two seconds when power up, follows on screen instruction and apply the build from microSD card to eMMC.
| Distribution | Download Link | File Size | MD5 |
|---|---|---|---|
| Sailfish with RK2AW | ppp-factory-image-20231118.img.gz | 447MB | 4e31e0a6b0999e3e3df45f86a7dc9c33 |
| Manjaro with Tow-Boot | Manjaro-ARM-plasma-mobile-pinephonepro-factory-20211212.img.xz | 1.37GB | b82ba02287c1699b14fed403ce485b44 |
Arch Linux ARM
(Unofficial) Arch Linux ARM with choice of Phosh UI, Plasma Mobile, sxmo or barebones. Currently being maintained by the DanctNIX community (GitHub: danctnix, dreemurrs-embedded).
Download
Get both stable and test builds at GitHub releases.
| Default credentials | |
|---|---|
alarm | 123456 |
root (barebone only) | root |
Notes
The GitHub page can be found here: dreemurrs-embedded/Pine64-Arch
A re-image of the above Arch image providing a Btrfs root partitioning has been made by user kaida.
Gentoo

There are unofficial Gentoo overlays with ebuilds for the PinePhone Pro. There are no images - the image must be built manually, including picking the kernel, bootloader and the desired desktop environment. The ARM64 version of Gentoo has to be selected. The PinePhone Pro will not boot with P-Boot but will boot with U-Boot, there is an ebuild for it.
Download
The overlay can be found under https://github.com/stealthgun/gjdwebserver-overlay
Notes
See https://stealthgun.tweakblogs.net/blog/19830/gentoo-on-a-pinephone-pro for the documentation.
GloDroid
A fully open-source port of Android and LineageOS to the PinePhone Pro.
GitHub: GloDroid
Download
- Releases: GloDroid
Notes
Project status link
LuneOS
LuneOS is one of the original multi-tasking OS-es that runs on Linux. Based on HP/Palm’s webOS, merged with latest technology stack from LG called webOS OSE (a derivative of what LG uses on their Smart TV’s), software such as Qt5 and makes use of the Yocto build system.
Download
- LuneOS (Initial preview): Downloads
| Default credentials | |
|---|---|
root |
Notes
In order to connect to the device using SSH/SCP via WiFi: You can simply connect via SSH/SCP via WiFi using the PinePhonePro’s IP address on port 22.
Manjaro ARM
Manjaro is a user-friendly Linux distribution based on the independently developed Arch operating system with the Plasma Mobile and Phosh desktop environment.
Download
| Default credentials | |
|---|---|
manjaro | 123456 |
root | root |
Mobian
A Mobian build for ARM64 running with Phosh. The current version of the base Debian system is Debian Bookworm. See the installation instructions here. If you have questions about Mobian, please ask them in the Mobian Matrix room.
Download
| Default credentials | |
|---|---|
mobian | 1234 |
Notes
The development is work in progress. The Mobian wiki can be found here.
In order to connect to the device using SSH/SCP via WiFi, you need to install SSH on the device. You can do this by executing the following in a shell: “sudo apt-get install ssh”, afterwards you can connect via SSH/SCP via WiFi using the PinePhonePro’s IP address on port 22.
Kali Linux
The official Kali Nethunter images for PinePhone and PinePhone Pro have been released now. Get Nethunter App for your PinePhone’s Kali Linux.
Download
| Default user for Unofficial Releases | |
|---|---|
kali | 8888 |
| Default user for Nethunter Releases | |
|---|---|
kali | 1234 |
Nemo Mobile

Nemo Mobile is the open source build of Sailfish OS with a open source UI called Glacier, based on Manjaro.
Download
| Default credentials | |
|---|---|
manjaro | 123456 |
root | root |
Notes
The website of the Nemo Mobile UX Team can be found here. Please report bugs regarding the Nemo Mobile UI as GitHub issue.
NixOS

NixOS is a Linux distribution built on top of the Nix package manager using declarative configuration to allow reliable system upgrades.
Download
Not available yet.
Notes
WIP. See https://github.com/NixOS/mobile-nixos/issues/440
postmarketOS
postmarketOS extends Alpine Linux to run on smartphones and other mobile devices. It offers various user interfaces (Phosh, Plasma Mobile, Sxmo, Plasma Desktop, Gnome 3, Kodi, XFCE4, […]).
Download
Note that images for the PinePhone Pro are in the “community” category of devices indicating some features may not work. You can also build your own image using pmbootstrap
| Default credentials | |
|---|---|
user | 147147 |
Notes
See the pine64-pinephonepro page of the postmarketOS wiki for details.
Rhino Linux
Rhino Linux is an Ubuntu-based distribution that uses the rolling-release model by tracking the devel branch of repositories. The port is currently maintained by Oren Klopfer (oklopfer).
Tow-Boot is required for installing Rhino Linux. Instructions for installing Tow-Boot to the PinePhone Pro can be found here. After Tow-Boot has been installed to your device, Rhino Linux installation just requires flashing the .img.xz to an SD or the eMMC.
Download
- Rhino Linux Downloads (select Pine64 on the dropdown)
| Default credentials | |
|---|---|
rhino | 1234 |
Notes
Foundational to the distribution is Pacstall, a Debian-based user repository inspired by the AUR. Additionally, RL comes with Unicorn, a custom modified version of XFCE with various modernizations and improvements, including auto-rotation for mobile devices.
Discord - Matrix - GitHub - Wiki
Ubuntu Touch
A Mobile Version of the Ubuntu Operating System made and maintained by the UBports Community. The port is currently maintained by Oren Klopfer (oklopfer).
Tow-Boot is required for installing the latest version of Ubuntu Touch (20.04) to the PinePhone Pro. Instructions for installing Tow-Boot to the PinePhone Pro can be found here.
Installation instructions can be found at
this UBports post. After Tow-Boot has been installed to your device, Ubuntu Touch installation just requires flashing the .img.xz to an SD or the eMMC.
Download
| Default credentials | |
|---|---|
| Regular user | Set during boot |
phablet (root) | 1234 |
Notes
Scroll down to the middle of the GitLab project page, or directly here at the UBports website to see which features work.
Contributions and bug reports can be made at the UBports PinePhone Pro GitLab page. See UBports website for how to donate.
Multi-distribution image
A PinePhone Pro analogue of the PinePhone multi-distro demo image. This image allows the user to switch between multiple Linux distributions without having to swap microSD cards.
Download
Clone this git repository and follow the instructions in the README to create a bootable microSD card.
Notes
The shell script in the repository above was derived from these instructions.
Various DPA Images
Multiple versions of unofficial images of various Debian-based distributions by the user DPA. They also contain some of DPA’s own software.
Download
The latest successful image builds can be found here: https://repo.dpa.li/apt/dpa-image-builder/images/?board=pinephone-pro
Notes
Most of these images are still in development / incomplete and DPA doesn’t have time to test them all, but they can still be useful as a starting point to get distributions running for which no other images have been created yet. DPA made these images because they wanted to run their favorite distribution, Devuan, on their phone.
The build scripts can be found in various places: GitLab, my server, GitHub
In theory, these build scripts can create images for any Debian-based distribution which supports ARM64 and can be bootstrapped using debootstrap.
Software State
Presently the PinePhone Pro Explorer Edition is aimed at Linux developers with an extensive knowledge of embedded systems and/or experience with mobile Linux. It will take time for all the PinePhone Pro’s functionality to reach software parity with the original PinePhone and for mobile operating systems, in more general, to reach a higher degree of maturity.
Bear in mind that the software for these smartphones is still in a very early stage, with most of the software being in alpha or beta state. That’s especially also the case for scalability of applications, their availability and practicability, any hardware function implementations and the firmware. The software is provided as is. There is no warranty for the software, not even for merchantability or fitness for a particular purpose.
The following table lists the feature functionality status of the unaltered pre-installed factory image of the current shipping batch and as comparison an up-to-date reference image (no responsibility is accepted for the accuracy of this information, the list is provided and updated by the community). If you have any questions regarding the current state of the software or of specific features working, please don’t hesitate to ask in the community chat before buying the device:
- Discord: #pinephone under https://discord.gg/pine64
- IRC: #pinephone on irc.pine64.org. Note: please consider Matrix, Discord or Telegram due to the volatile nature of IRC
- Matrix: https://app.element.io/#/room/#pinephone:matrix.org
- Telegram: https://t.me/pinephone
Bootloader:
| Component | Status | Notes |
|---|---|---|
Bootloader | Working | |
SPI | Working | |
Boot GUI | Working | Devices bought after July 2022 come with Tow-Boot or rk2aw flashed to the SPI memory |
Operating System:
| Component | Status | Notes |
|---|---|---|
Stability | WIP | |
Suspend | Experimental | Audio is often higher pitched after waking up from suspend due to a bug, make sure to update your systemReport; Report |
Updates | WIP | The pre-flashed and outdated operating system on the eMMC often gets corrupted after updatingExample; Pacman database lock preventing updatesSolution; Keyring bug (solution is to run “pinephonepro-post-install” script as root). |
Modem:
| Component | Status | Notes |
|---|---|---|
General | WIP | Alternative firmware; Slow wakeupReport; Some carriers blocking specific TANs in their network; Note: Proprietary firmware |
Phone | WIP | The modem connection crashes frequently, which can lead to missed callsReport; Alternative firmware; Slow wakeupReport; bad call audio qualityReport; Audio is often higher pitched after waking up from suspend due to a bugReport; Report |
SMS | Working | SMS functionality is expected to work. In certain cases the functionality might be blocked by a clogged modemReport; Some bugs |
MMS | WIP | MMS functionality is integrated into the application “Spacebar”, some bugs remaining and expected |
Push notifications | Not implemented | Receiving push notifications while the phone is suspended is not implemented |
Components:
| Component | Status | Notes |
|---|---|---|
LCD | WIP | Hardware issueDetails |
Touch | Working | |
Rear camera | WIP | Camera work-in-progress with DTS fix[Citation]; userspace still needs to do some catching up; Green image tint[Citation] |
Front camera | WIP | Camera work-in-progress with DTS fix[Citation]; userspace still needs to do some catching up; Green image tint[Citation] |
Camera flash | Critical issues | Hardware issueDetails; Note: /sys/class/leds/white:flash |
WiFi | Working | WiFi is expected to work. The firmware does not support monitor mode and package injection. Note: Proprietary firmware |
Bluetooth | WIP | Bluetooth not necessarily working for calls yet due to missing audio routing[Citation]; Bluetooth in general dodgy under Pulseaudio.Info Note: Proprietary firmware |
GNSS/GPS | WIP | aGPS to be implemented; long loading times to get a GPS fix[Citation]; No preinstalled application[Citation] |
Sensors | WIP | “Geo Magnetic Sensor” (af8133j): Status unknown (at /sys/bus/i2c/devices/4-001c/iio:device1)“Accelerometer / Gyroscope” ( mpu6500): Working (at /sys/bus/i2c/devices/4-0068/iio:device2)“Ambient light / Proximity” ( stk3311): Working after updating |
Vibration motor | Working | |
Notification LED | Working | |
Buttons | Working | Power buttons and volume buttons are working. |
Accessory compatibility, spare parts:
| Component | Status | Notes |
|---|---|---|
Keyboard Add-on | WIP | The keyboard add-on compatibility is work-in-progress. |
LoRa Add-on | Not implemented | No software support implemented |
Qi Wireless Charging Add-on | WIP | Wireless charging with the add-on case is expected to work to some degree. Certain software functionality and a driver is currently missing[Citation] |
Fingerprint Reader Add-on | Not implemented | No software support implemented |
Spare parts | Partial | Some spare parts now available in the store.Store |
Software notes:
| Component | Status | Notes |
|---|---|---|
Waydroid | Working | Waydroid is an Android container used to run Android applications. |
¹ Status of the features at the time of the last factory installation without updates
² Status of the features with an up-to-date reference image
Bootloaders
The following section contains notes regarding compatible bootloaders with the PinePhone Pro.
rk2aw
The rk2aw loader program is designed for modern Rockchip SoCs. It modifies the boot ROM bootloader load order from the original and rigid “SPI NOR flash -> eMMC -> SD card” to a more flexible “SD card -> eMMC -> SPI NOR flash”. Additionally, it enables robust A/B bootloader updates in SPI NOR flash, allowing users to choose fallback options via a pre-boot menu. For details see the rk2aw page.
U-Boot
U-Boot is an open-source bootloader commonly used in embedded operating systems and is often pre-installed on device images.
Tow-Boot
Tow-Boot is an opinionated distribution of U-Boot and brings numerous advantages over stock U-Boot, such as the possibility to choose from booting the eMMC or microSD card using the volume buttons during boot, as well as a USB Mass Storage mode, where the device can be written to by connecting the device to a computer via USB.
The user can flash Tow-Boot to the PinePhone Pro using the instructions on the Tow-Boot website.
levinboot
The levinboot bootloader is another option for the PinePhone Pro. The project repository can be found here. (Pinephone Pro supporting fork is here.)
Multi-distribution image
This article explains how to install a multiple linux distribution environment on your PinePhone Pro. You can choose to install this environment to the phone’s internal eMMC memory or to a microSD card. These instructions also integrate with the multi-distribution image releases page section.
Variables
During the processes of partitioning the target device, building the image or installing the bootloader, make sure the variables are properly defined. Each time you open a new terminal window, the values of the variables must be re-set.
DEV is the device name from the lsblk command
ATTR are the attributes of each partition/distribution
SIZE is the GiB capacity of each partition/distribution
NameUrl is the Key:Value of distribution name and relative URL download address
This guide has been tested with 6 Linux distributions on a 128 GiB microSD card, and following variables:
$ BASE=ppp-multi-image
$ DEV=sdb # i.e. sdb or mmcblk0
$ ATTR=RequiredPartition,LegacyBIOSBootable
$ SIZE=11GiB

$ declare -A NameUrl
$ NameUrl[uboot]=https://xff.cz/kernels/bootloaders-2024.04/ppp.tar.gz
$ #NameUrl[uboot]=https://megous.com/dl/tmp/ppp.tar.gz # test build
$ NameUrl[arch]=https://github.com/dreemurrs-embedded/Pine64-Arch/releases/download/20240326/archlinux-pinephone-pro-phosh-20240326.img.xz
$ NameUrl[manjaro]=https://github.com/manjaro-pinephone/phosh/releases/download/beta37/Manjaro-ARM-phosh-pinephonepro-beta37.img.xz
$ NameUrl[mobian]=https://images.mobian.org/pinephonepro/weekly/mobian-rockchip-phosh-20250706.img.xz
$ NameUrl[pmos]=https://images.postmarketos.org/bpo/v23.12/pine64-pinephonepro/phosh/20240501-0425/20240501-0425-postmarketOS-v23.12-phosh-22.3-pine64-pinephonepro.img.xz
$ NameUrl[sailfish]=https://gitlab.com/sailfishos-porters-ci/dont_be_evil-ci/-/jobs/artifacts/master/download?job=pinephonepro-rootfs
$ NameUrl[ut]=https://ci.ubports.com/job/focal-hybris-rootfs-arm64/job/master/lastSuccessfulBuild/artifact/ubuntu-touch-pinephone-pro-img-arm64.raw.xz
$ NameUrl[extra]=
Install rk2aw
Make sure your phone has the rk2aw pre-loader installed to its SPI flash memory. PinePhone Pro models ordered after November 2023 are shipped with rk2aw pre-installed. Otherwise, follow the instructions in this section to install it.
Boot up the PinePhone Pro’s stock operating system and start a shell session. You can do this either by opening the terminal emulator app, or by enabling the SSH service and logging in from a PC on the same network. Then execute the following commands (from the phone’s shell):
$ curl -O https://xff.cz/kernels/bootloaders-2024.04/ppp.tar.gz
$ tar -xvzf ppp.tar.gz
$ cd ppp
$ sudo ./spinor-flash-initial-setup.sh
The multi-boot image can function without rk2aw, but you will need to make sure the correct bootloader is started by your phone’s SoC.
If you are installing to a microSD card, then either:
- Ensure that the phone’s SPI flash and eMMC are empty, or
- Hold down the RE button during boot to force the phone to boot from the microSD card by disabling the SPI flash and the eMMC.
If you are installing to the eMMC, make sure the SPI flash is empty.
Further instructions can be found on the author’s website.
Expose the device
Connect your PinePhone Pro to a Linux computer, with the stock USB cable. Press power button on. From the graphical menu select eMMC over USB or SD over USB to expose the device to your computer. You can optionally flash microSD directly into your computer’s slot, if available.
Erasing
Make sure there are no signatures or partitions left, and overwrite the first sectors with zeroes. You can find the target device under lsblk command.
$ sudo wipefs /dev/$DEV
$ sudo wipefs --all --force /dev/$DEV*
$ sudo dd if=/dev/zero of=/dev/$DEV status=progress bs=32768 count=1
Optionally you can zeroes the whole device:
$ sudo dd if=/dev/zero of=/dev/$DEV status=progress bs=32768 count=$(expr $(lsblk -bno SIZE /dev/$DEV | head -1) \/ 32768)
Partitioning
Partition the device for the multiple distributions:
$ sudo sfdisk /dev/$DEV --wipe always <<EOF
label: gpt
first-lba: 64
table-length: 10
attrs=RequiredPartition, type=D7B1F817-AA75-2F4F-830D-84818A145370, start=64, size=32704 name="uboot_raw"
$(
for name in "${!NameUrl[@]}"; do
  case ${name} in (uboot|extra) continue ;; esac
  printf '%s\n' "attrs=\"$ATTR\", size=$SIZE, name=\"$BASE-${name}\""
done | sort
)
attrs="$ATTR", size=$SIZE, name="$BASE-ut-data"
attrs="$ATTR", size=+, name="extra"
EOF
Returned string:
sudo sfdisk /dev/$DEV --wipe always <<EOF
label: gpt
first-lba: 64
table-length: 10
attrs=RequiredPartition, type=D7B1F817-AA75-2F4F-830D-84818A145370, start=64, size=32704 name="uboot_raw"
attrs="RequiredPartition,LegacyBIOSBootable", size=11GiB, name="ppp-multi-image-arch"
attrs="RequiredPartition,LegacyBIOSBootable", size=11GiB, name="ppp-multi-image-manjaro"
attrs="RequiredPartition,LegacyBIOSBootable", size=11GiB, name="ppp-multi-image-mobian"
attrs="RequiredPartition,LegacyBIOSBootable", size=11GiB, name="ppp-multi-image-pmos"
attrs="RequiredPartition,LegacyBIOSBootable", size=11GiB, name="ppp-multi-image-sailfish"
attrs="RequiredPartition,LegacyBIOSBootable", size=11GiB, name="ppp-multi-image-ut"
attrs="RequiredPartition,LegacyBIOSBootable", size=11GiB, name="ppp-multi-image-ut-data"
attrs="RequiredPartition,LegacyBIOSBootable", size=+, name="extra"
EOF
Expected results:
Checking that no-one is using this disk right now ... OK
Disk /dev/sd[...]: 118.16 GiB, 126877696000 bytes, 247808000 sectors
Disk model: microSD card Reader
Units: sectors of 1 * 512 = 512 bytes
Sector size (logical/physical): 512 bytes / 512 bytes
I/O size (minimum/optimal): 512 bytes / 512 bytes
>>> Script header accepted.
New situation:
Disklabel type: gpt
Disk identifier: A012E9D0-B4EB-4677-926F-D93AE4C696FA
 Device    Start       End  Sectors   Size Type
 sdb1         64     32767     32704   16M unknown
 sdb2      32768  23101439  23068672   11G Linux fs
 sdb3   23101440  46170111  23068672   11G Linux fs
 sdb4   46170112  69238783  23068672   11G Linux fs
 sdb5   69238784  92307455  23068672   11G Linux fs
 sdb6   92307456 115376127  23068672   11G Linux fs
 sdb7  115376128 138444799  23068672   11G Linux fs
 sdb8  138444800 161513471  23068672   11G Linux fs
 sdb9  161513472 247805951 86292480  41.1G Linux fs
The partition table has been altered.
Calling ioctl() to re-read partition table.
Syncing disks.
Install U-Boot
In order to display the graphical distribution selector when the phone boots, we need to install a custom version of the U-Boot bootloader.
First, use the following commands to download the required U-Boot image. Note that we are downloading the same ppp.tar.gz archive as we did in the rk2aw section; if you already have a copy of this archive on your computer, you may skip the download and simply extract its contents into ~/$BASE/downloads/.
$ NAME=uboot
$ mkdir -p ~/$BASE/downloads && cd ~/$BASE/downloads
$ wget ${NameUrl[$NAME]}
$ tar -xvzf $(basename "${NameUrl[$NAME]}")
Then, use the following command to install the U-Boot image to the correct location on the microSD/eMMC:
$ sudo dd if=ppp/foss/u-boot-rockchip.bin of=/dev/$DEV bs=512 seek=64 status=progress conv=fsync
If you are interested in building this U-Boot image yourself, you can download the source code from xff.cz. However, you will still need a copy of ppp.tar.gz since it contains the U-Boot build configuration file (ppp/foss/.config).
Copy this file to the root of your U-Boot source directory, keeping the name .config. You can then use make to initiate the build process.
Build the partitions
Make sure you download an updated file from relases page. You will need to build each partition one by one, setting properly the variables and using specific commands according the selected distribution. When you reach the building repeat advice, come back to this point and build the next distribution.
Arch, Manjaro, Mobian, postmarketOS
For these distributions, download and decompress the image:
$ NAME=arch # set distribution name, i.e. arch, manjaro, mobian, pmos
$ mkdir -p ~/$BASE/downloads && cd ~/$BASE/downloads
$ wget ${NameUrl[$NAME]}
$ xz -v -d -k $(basename "${NameUrl[$NAME]}")
$ mv $(basename -as .xz "${NameUrl[$NAME]}") $NAME.img
Mount the image:
$ cd ~/$BASE/downloads
$ sudo losetup -P /dev/loop0 $NAME.img
$ sudo mkdir -p /mnt/$NAME/boot /mnt/$NAME/root /mnt/$NAME/dev
$ sudo mount /dev/loop0p1 /mnt/$NAME/boot/
$ sudo mount /dev/loop0p2 /mnt/$NAME/root/
Copy root and boot contents:
$ sudo dd if=/dev/loop0p2 of=/dev/disk/by-partlabel/$BASE-$NAME bs=1M status=progress conv=fsync
$ sudo mount /dev/disk/by-partlabel/$BASE-$NAME /mnt/$NAME/dev/
$ sudo scp -r /mnt/$NAME/boot/* /mnt/$NAME/dev/boot
SailfishOS
This distribution needs different commands. Download and decompress the image:
$ NAME=sailfish
$ mkdir -p ~/$BASE/downloads && cd ~/$BASE/downloads
$ wget ${NameUrl[$NAME]} -O artifacts.zip
$ unzip artifacts.zip
$ mv pinephonepro/*/*.tar.bz2 sailfish.tar.bz2
$ mkdir -p ~/$BASE/downloads/sailfishos
$ sudo tar -xvf sailfish.tar.bz2 -C sailfishos/ > /dev/null
Format the partition and copy the extracted files directly onto the device:
$ sudo mkfs.ext4 -F /dev/disk/by-partlabel/$BASE-$NAME
$ sudo mkdir -p /mnt/$NAME/dev
$ sudo mount /dev/disk/by-partlabel/$BASE-$NAME /mnt/$NAME/dev
$ sudo rsync -avz --progress ~/$BASE/downloads/sailfishos/ /mnt/$NAME/dev
$ sudo chmod a=rwx /mnt/$NAME/dev/boot/*
Ubuntu Touch
For this distribution, download and decompress the image:
$ NAME=ut
$ mkdir -p ~/$BASE/downloads && cd ~/$BASE/downloads
$ wget ${NameUrl[$NAME]}
$ xz -v -d -k $(basename "${NameUrl[$NAME]}")
$ mv $(basename -as .xz "${NameUrl[$NAME]}") $NAME.img
Mount the image:
$ cd ~/$BASE/downloads
$ sudo losetup -P /dev/loop0 $NAME.img
$ sudo mkdir -p /mnt/$NAME/boot /mnt/$NAME/system /mnt/$NAME/userdata /mnt/$NAME/dev
$ sudo mount /dev/loop0p2 /mnt/$NAME/boot/
$ sudo mount /dev/loop0p3 /mnt/$NAME/system/
$ #sudo mount /dev/loop0p4 /mnt/$NAME/userdata/
Create the userdata partition and copy system and boot contents:
$ sudo mkfs.ext4 -F /dev/disk/by-partlabel/$BASE-$NAME-data
$ sudo e2label /dev/disk/by-partlabel/$BASE-$NAME-data $NAME-data
$ sudo dd if=/dev/loop0p3 of=/dev/disk/by-partlabel/$BASE-$NAME bs=1M status=progress conv=fsync
$ sudo mount /dev/disk/by-partlabel/$BASE-$NAME /mnt/$NAME/dev/
$ sudo scp -r /mnt/$NAME/boot/* /mnt/$NAME/dev/boot
All distributions
If present, you can optionally backup boot.scr, extlinux.conf and fstab files.
$ sudo mkdir -p /mnt/$NAME/dev/boot/extlinux
$ [ ! -f /mnt/$NAME/dev/boot/extlinux/extlinux.conf ] || sudo mv /mnt/$NAME/dev/boot/extlinux/extlinux.conf /mnt/$NAME/dev/boot/extlinux/extlinux.conf.bk
$ [ ! -f /mnt/$NAME/dev/boot/boot.scr ] || sudo mv /mnt/$NAME/dev/boot/boot.scr /mnt/$NAME/dev/boot/boot.scr.bk
$ [ ! -f /mnt/$NAME/dev/boot/boot.pinephonepro.scr ] || sudo mv /mnt/$NAME/dev/boot/boot.pinephonepro.scr /mnt/$NAME/dev/boot/boot.pinephonepro.scr.bk
$ sudo mv /mnt/$NAME/dev/etc/fstab /mnt/$NAME/dev/etc/fstab.bk
Then write the new /boot/extlinux/extlinux.conf file, making sure you remove # comment for the selected distributions:
$ sudo tee /mnt/$NAME/dev/boot/extlinux/extlinux.conf <<EOF
## /boot/extlinux/extlinux.conf
menu title Pinephone Pro Boot Menu

## uncomment next line for timed default-selected distro
#default $NAME

timeout 50
label $NAME
menu label $NAME

## uncomment next 3 lines for ARCH
#fdt    /boot/dtbs/rockchip/rk3399-pinephone-pro.dtb
#initrd /boot/initramfs-linux.img
#kernel /boot/Image.gz

## uncomment next 3 lines for MANJARO
#fdt    /boot/dtbs/rockchip/rk3399-pinephone-pro.dtb
#initrd /boot/initramfs-linux.img
#kernel /boot/Image

## uncomment next 3 lines for MOBIAN
#fdtdir /boot/dtbs/6.12-rockchip/
#initrd /boot/initrd.img-6.12-rockchip
#linux  /boot/vmlinuz-6.12-rockchip

## uncomment next 3 lines for PMOS
#fdtdir /boot/dtbs-pine64-pinephonepro/
#initrd /boot/initramfs-extra
#linux  /boot/vmlinuz

## uncomment next 2 lines for SAILFISH
#fdt    /boot/rockchip/rk3399-pinephone-pro.dtb
#kernel /boot/Image

## uncomment next 3 lines for UT
#fdtdir /boot/dtb-6.5.0-okpine-ut/
#initrd /boot/initrd.img-6.5.0-okpine-ut
#linux  /boot/vmlinuz-6.5.0-okpine-ut

## uncomment next line for all distros, excluding UT
## since there is a bug related to wifi from wpa_supplicant in Archlinux add 'brcmfmac.feature_disable=0x82000' just before 'rw rootwait'
#append root=PARTLABEL=$BASE-$NAME console=ttyS2,115200 console=tty0 loglevel=7 rw rootwait

## uncomment next line for UT only
#append root=PARTLABEL=$BASE-$NAME console=ttyS2,115200 console=tty loglevel=7 systempart=/dev/disk/by-partlabel/$BASE-$NAME datapart=/dev/disk/by-partlabel/$BASE-$NAME-data security=apparmor rw rootwait

EOF
Then write the new /etc/fstab file, making sure you remove # comment for selected distribution:
$ sudo tee /mnt/$NAME/dev/etc/fstab <<EOF
## <file system> <dir> <type> <options> <dump> <pass>

## uncomment next line for ARCH
#PARTLABEL=$NAME / ext4 rw,relatime 0 1

## uncomment next line for MANJARO
#PARTLABEL=$NAME / ext4 defaults 0 1

## uncomment next line for MOBIAN
#PARTLABEL=$NAME / ext4 defaults,x-systemd.growfs 0 1

## uncomment next line for PMOS
#PARTLABEL=$NAME / ext4 defaults 0 0

## uncomment next 7 lines for SAILFISH
#PARTLABEL=$NAME / ext4     rw,noatime          0 1
#devtmpfs /dev     devtmpfs nosuid              0 0
#devpts   /dev/pts devpts   gid=5,mode=620      0 0
#tmpfs    /dev/shm tmpfs    noexec,nosuid,nodev 0 0
#proc     /proc    proc     defaults            0 0
#sysfs    /sys     sysfs    defaults            0 0
#tmpfs    /tmp     tmpfs    nosuid,nodev        0 0

## uncomment next 3 lines for UT
#PARTLABEL=$NAME      /         ext4 defaults 0 1
#PARTLABEL=$NAME      /boot     ext4 defaults 0 2
#PARTLABEL=$NAME-data /userdata ext4 defaults 0 2

EOF
Close any mounted directory window.
Unmount, detach and resize
To unmount and deatch all building images, run:
$ sudo umount /mnt/$NAME/*
$ sudo rm -r /mnt/$NAME
$ sudo losetup -D
On the first boot, if it doesn’t happen automatically, you can manually resize each image to fill the entire partition using GParted GUI software or using the CLI. Please note that SailfishOS doesn’t need any resizing.
$ sudo e2label /dev/disk/by-partlabel/$BASE-$NAME $NAME
$ sudo e2fsck -f /dev/disk/by-partlabel/$BASE-$NAME
$ sudo resize2fs /dev/disk/by-partlabel/$BASE-$NAME
Follow-up notes
Any time a distribution update rebuilds the initramfs it is necessary to delete /boot/boot.scr again to keep the rk2aw menu clean.
In case you want to reinstall only one distribution, the easy way is to delete and recreate the selected partition using the GParted GUI.
If the device doesn’t start, connect a compatible serial cable to the headphone jack and a computer, switch off microswitch 6 and start a serial console to investigate further. Find out the corresponding USB device using ls /dev/ttyUSB* and then connect to it with for example minicom using the command minicom -b 1500000 -D /dev/ttyUSB[...], where […] is the number of the USB device.
To find the exact LABEL, UUID, PARTLABEL and PARTUUID names, open a terminal window on the phone and use the command blkid.
Appendix
Build the postmarketOS image
You can optionally use pmbootstrap to generate the distribution image on your Linux computer, instead of downloading a pre-made image. Make sure you install pmbootstrap before building the image.
Start creating 2 GB empty image file, format and mount it.
$ sudo su
# dd if=/dev/zero of=postmarketos.img bs=1 count=0 seek=2G status=progress && sync
# mkfs.ext4 postmarketos.img
# losetup -P /dev/loop0 postmarketos.img
# exit
Then build the image using pmbootstrap
$ pmbootstrap init
$ pmbootstrap status
$ pmbootstrap pull
$ pmbootstrap install --sdcard=/dev/[LOOP-DEVICE]
$ pmbootstrap shutdown
Troubleshooting
If the PinePhone Pro is not booting (either booting incompletely into a boot splash or tty or if the PinePhone Pro is showing no signs of life) this will typically have the following two reasons:
The battery is fully drained
If the battery is drained then the board can reset during boot causing a boot loop because of undervoltage condition. It can happen on all stages of the boot including U-Boot bootloader, display initialization and USB (re-)configuration. In that case it is not possible to charge the phone. The battery can be charged by interrupting the boot loop by booting the PinePhone Pro into Maskrom mode or by charging the battery externally. It is possible to follow these instructions without a computer by using a wall charger, however it would not be possible to determine if Maskrom mode was started successfully. To boot the PinePhone Pro into Maskrom mode:
- Remove any microSD card from the phone and keep it removed for the below procedure
- Remove the battery, any USB cable and any serial cable
- Reinsert the battery
- Hold the RE button underneath the back cover of your Explorer Edition (or short the bypass contact points on the Developer Edition)
- Connect the phone to an USB port of a computer, while still holding the button for some time
- Confirm if the phone was booted in Maskrom mode:
- On Linux check if the Maskrom mode appears as device in the output of the terminal command
lsusbon the computer, the expected VID:PID of the device is 2207:330c. - On Windows this can be checked using the Device Manager and checking the VID “2207” and PID “330c” of an Unknown device appears.
- On macOS this can be checked in /Applications/Utilities/System Information.app under USB and by checking if the VID “2207” and PID “330c” is appearing for a Composite Device.
- On Linux check if the Maskrom mode appears as device in the output of the terminal command
- Let the phone charge for multiple hours
The device should now be able to boot from the boot medium again. If that is not the case the installation got corrupted, as explained below.
The installation is corrupted
The PinePhone Pro won’t be able to boot if the installation on the SPI flash, the eMMC or the microSD card got corrupted. To boot a working operating system:
- Prepare a microSD card as explained in the section Flashing to microSD card
- Remove any USB-C cable or device or add-on case from the PinePhone Pro
- Make sure the device is powered off by shortly removing the battery for a second
- Insert the microSD card into the top slot of the PinePhone Pro. Make sure the microSD card is inserted all the way and that the notch of the right side of the microSD card is not visible anymore.
- Power on the device (bypassing the SPI and eMMC might be required, see Boot order)
The device should now boot from the microSD card. If the phone does not boot from the microSD card the microSD card was flashed with an incompatible image or the battery got drained as explained above.
Modem
The PinePhone Pro uses Quectel EG25-G as modem. AT commands are used to communicate with the modem.
AT commands
A list of documented AT commands can be found for example in this AT commands documentation from Quectel. Further undocumented AT commands found by the developer megi, who reverse-engineered parts of the modem and its firmware, can be found on megi’s website here.
To send AT commands to the modem under Linux, minicom or the often-preinstalled atinout utility can be used.
atinout example:
echo "AT+<command here>" | sudo atinout - /dev/ttyUSB2 -
minicom example:
minicom -D /dev/ttyUSB2
VoLTE
The PinePhone and PinePhone Pro modem supports VoLTE and comes with a few VoLTE profiles preloaded. Most operating systems try to set the correct profile automatically.
To list the available VoLTE profiles:
AT+QMBNCFG="list"

+QMBNCFG: "List",0,1,1,"ROW_Generic_3GPP",0x0501081F,201901141
+QMBNCFG: "List",1,0,0,"VoLTE-ATT",0x0501033C,201909271
+QMBNCFG: "List",2,0,0,"hVoLTE-Verizon",0x05010141,201911251
+QMBNCFG: "List",3,0,0,"Sprint-VoLTE",0x05010205,201908141
+QMBNCFG: "List",4,0,0,"Commercial-TMO_VoLTE",0x05010505,201811231
+QMBNCFG: "List",5,0,0,"Telus-Commercial_VoLTE",0x05800C43,201912031
+QMBNCFG: "List",6,0,0,"Commercial-SBM",0x05011C18,201904021
+QMBNCFG: "List",7,0,0,"Commercial-DT",0x05011F1C,201905311
+QMBNCFG: "List",8,0,0,"Reliance_OpnMkt",0x05011B38,201910161
+QMBNCFG: "List",9,0,0,"TF_Germany_VoLTE",0x05010C1B,201909201
+QMBNCFG: "List",10,0,0,"TF_Spain_VoLTE",0x05010CFA,201909261
+QMBNCFG: "List",11,0,0,"Volte_OpenMkt-Commercial-CMCC",0x05012071,201904281
+QMBNCFG: "List",12,0,0,"OpenMkt-Commercial-CT",0x05011322,201911081
+QMBNCFG: "List",13,0,0,"OpenMkt-Commercial-CU",0x05011505,201807052
To select a profile manually, select the best fitting one or a generic one if none fits:
AT+QMBNCFG="select","ROW_Generic_3GPP"
Then enable Voice over LTE using:
AT+QCFG="ims",1
And reboot the modem to apply the settings:
AT+CFUN=1,1
To check the status of VoLTE during a call, the AT command CLCC can be used:
AT+CLCC

+CLCC: 1,1,0,1,0,"",128
+CLCC: 2,1,0,1,0,"",128
In the fourth item of the list, “0” means voice and and “1” means data. If both rows have “1” then the voice call is being carried over VoLTE.
APN settings
The APN setting is only required for a public Internet connection (“data”) on the phone. For tested APN settings and how to apply them see APN settings.
Carrier support
The page Carrier support contains information about the frequency support of different carriers and hints on setting up cellular network connectivity.
Documents
Detailed information about the modem can be found on the page of the developer megi, including reverse-engineered parts of the firmware and its functions. There is also a document about using the modem from January 18th 2020 by megi here. A script at the end of the document showcases a way to power off the modem before powering off the phone, which is integrated into most of the available operating systems.
Firmware update
There is a (nearly) free custom firmware and the stock firmware available for the PinePhone Pro. Both can be updated to a newer version with new features and bug fixes.
Custom firmware
There is a (nearly) free custom firmware for the PinePhone and PinePhone Pro modem by the developer biktorgj, which can be found here.
The custom firmware has various advantages (and zero disadvantages) over the stock firmware, including:
- Signal tracking support with checks against the OpenCelliD database
- Persistent storage is optional and unexpected shutdowns don’t mess up the modem
- A lower energy consumption due to the lower minimum clock frequency
- And many more, see Features not available on stock firmware
The custom firmware can be flashed using fwupd or a flashing script.
Stock firmware
The stock modem firmware can be updated to a newer version if it is outdated. The firmware version can be checked using the following AT command (at the example of atinout, alternatively minicom can be used to communicate with the modem too):
echo 'AT+QGMR' | sudo atinout - /dev/ttyUSB2 -
Pre-update checklist:
Please make sure all requirements of the checklist are fulfilled. If the update process is interrupted it will lead to a corrupted firmware of the modem, causing it to brick. Recovering a bricked modem is exponentially more complicated and requires the user to boot a special mode by physically bridging test points on the modem.
- The battery needs to be charged sufficiently
- The phone needs to be plugged into a charger
- Deep sleep is recommended to be disabled as it can interrupt the update process
- It is recommended to close all other running applications
- Use common sense while doing the update, don’t do the update while being impaired in any way
To get the latest firmware, clone the repository of user Biktorgj on the phone:
git clone https://github.com/Biktorgj/quectel_eg25_recovery
After cloning the directory, open it with cd:
cd quectel_eg25_recovery
Then run qfirehose, which starts the flashing process:
sudo ./qfirehose -f ./
The modem will automatically reboot after the update process is done. The boot process takes around 30 to 60 seconds. After that it is highly recommended to reboot the device.
Firmware modifications
See PineModems for more information regarding modem bootloader unlocking, building a custom modem firmware and modem recovery.
GPS / GNSS
The GPS engine in the modem supports mutli-GNSS reception from GPS, GLONASS, BeiDou, Galileo and QZSS independent of a cellular connection. The operation of the GNSS subsystem can be controlled via a separate set of AT commands, or via qmi. The A-GPS data upload uses the file management AT commands, which also have their own manual. These are linked in the documentation section.
As with most smartphones, the PinePhone Pro has a small antenna and has difficulty getting a first fix without assistance data, a cold start can take 15 minutes under good conditions. The eg25-manager is configured to upload A-GPS data by default (see here).
Basic testing of GNSS reception can be done by using the AT command interface (/dev/ttyUSB2) from a terminal program like minicom and the data output interface (/dev/ttyUSB1) to feed NMEA data into gpsmon or some other program that can parse standard NMEA sentences.
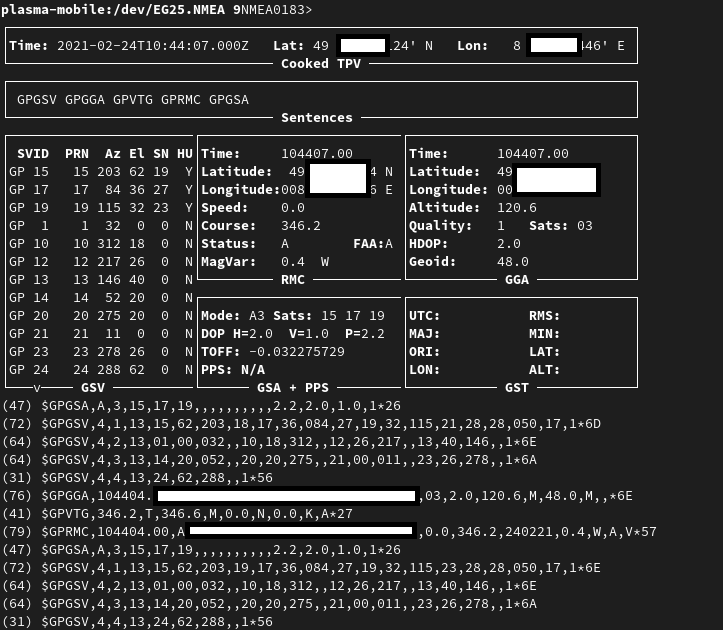
gpsmon decoding GPS data from /dev/ttyUSB1
To check if GNSS data output is enabled, you can
cat /dev/ttyUSB1
this should display a stream of NMEA sentences
$GPVTG,,T,,M,,N,,K,N*2C
$GPGSA,A,1,,,,,,,,,,,,,,,,*32
$GPGGA,,,,,,0,,,,,,,,*66
Further details can be found under Sensors and navigation.
Voice mail
The operating systems of the PinePhone Pro may not have support for accessing your voicemail by holding down the 1-key. Carriers might support accessing the voice mail via an external number however.
Privacy switches
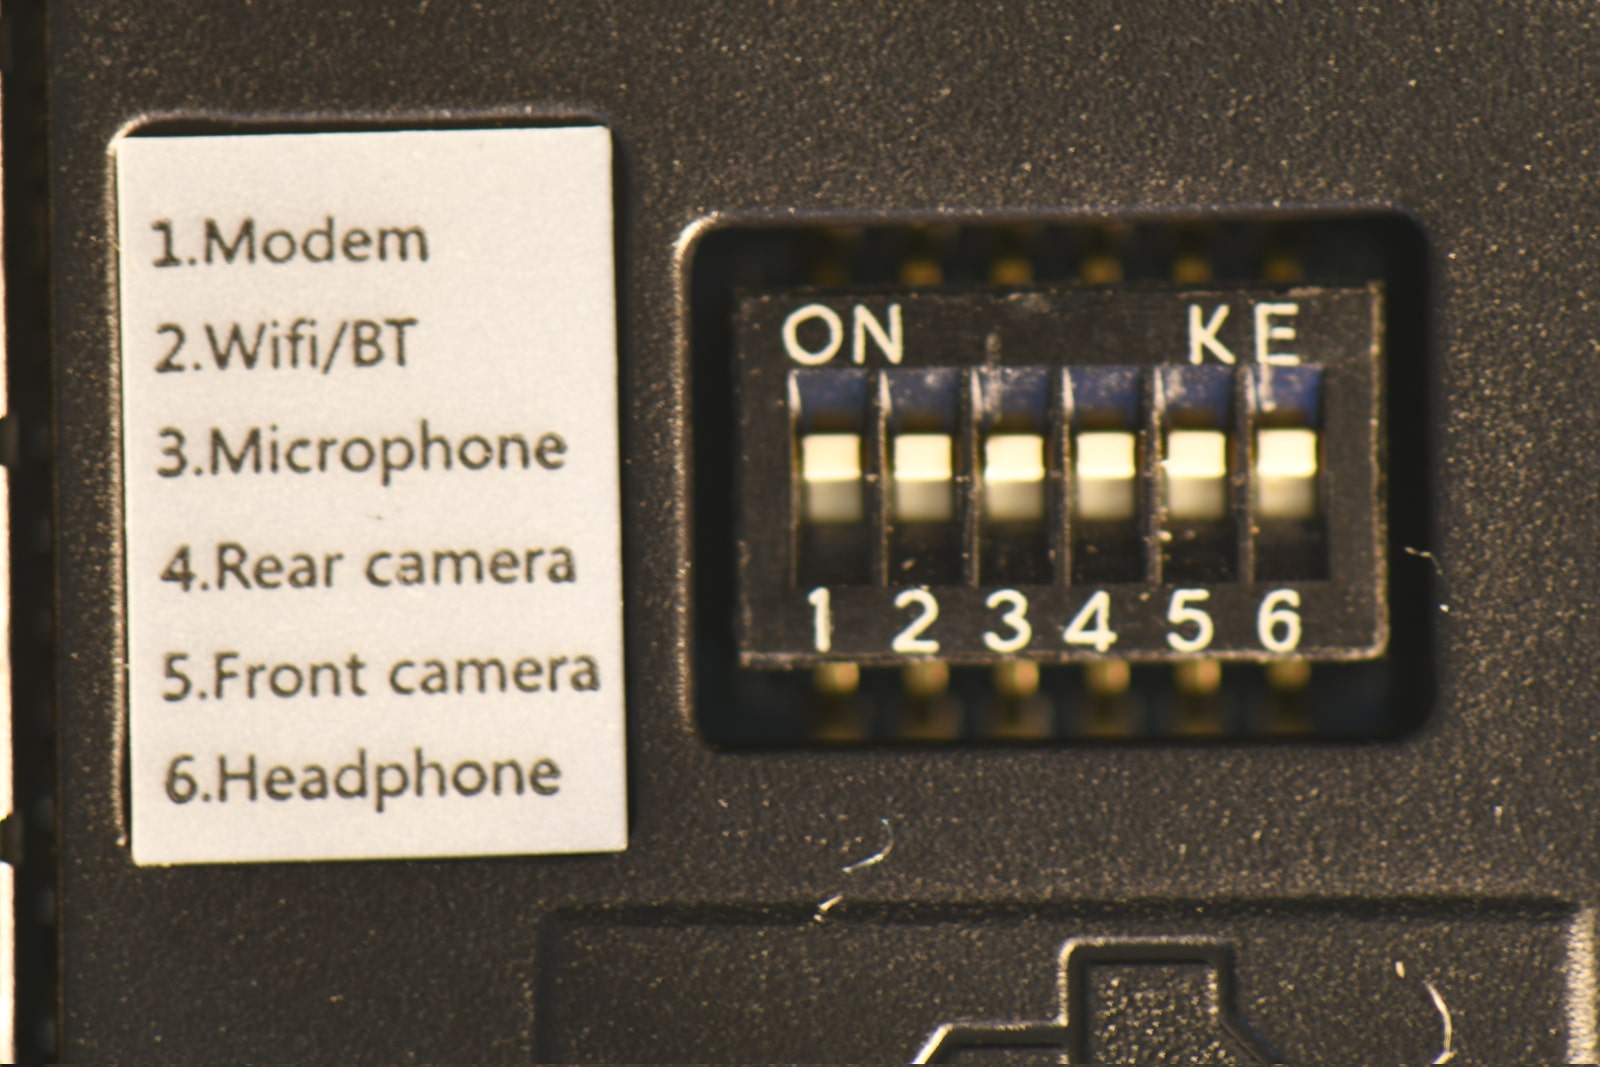
Picture of the privacy switches
The PinePhone features six switches that can be used to configure its hardware. They are numbered 1-6, with switch 1 located nearest to the modem. Their “on” position is toward the top of the phone.
| Number | Name | Description |
|---|---|---|
| 1 | Modem | “On” enables 2G/3G/4G communication and GNSS hardware, “off” disables it. |
| 2 | WiFi / Bluetooth | “On” enables WiFi and Bluetooth communication hardware, “off” disables it. |
| 3 | Microphone | “On” enables audio input from on-board microphones (not 3.5 mm jack), “off” disables it. |
| 4 | Rear camera | “On” enables the rear camera, “off” disables it. |
| 5 | Front camera | “On” enables the front camera, “off” disables it. |
| 6 | Headphone | “On” enables audio input and output via the 3.5 mm audio jack, “off” switches the jack to hardware UART¹ mode. |
¹ Note: The baud rate may be 1500000 instead of 115200.
Hardware
Components
| Component | Model |
|---|---|
| Touchscreen | Goodix GT917S |
| LCD | Himax HX8394 compatible |
| Rear camera | IMX258 |
| Front camera | OV8858 |
| Camera flash | AW3641EDNR |
| WiFi + Bluetooth | AzureWave AW-CM256SM |
| Modem | Quectel EG25-G |
| GNSS/GPS | Quectel EG25-G |
| 3 Axis Magnetometer | AF8133J |
| Geo Magnetic Sensor | Voltafield AF8133J |
| Ambient light / Proximity | STK3311-A |
| Accelerometer / Gyroscope | TDK MPU-6500 |
| Vibration motor | |
| Notification LED | LED0603RGB |
| Audio Codec | ALC5616 and ALC5640 |
| Volume buttons | Buttons connected to the KEYADC |
| Power button | |
| Battery fuel gauge | RK818 |
Replacement earpieces
The earpiece (or earpiece speaker) refers to the small speaker at the top of the PinePhone and PinePhone Pro.
This part is not available to purchase from the PINE64 Store. However, it is possible to buy a replacement earpiece for another device, and install it in a PinePhone or PinePhone Pro. This documents earpieces that have been tested by the community, and verified to work.
Note that the earpiece dimensions for both the PinePhone and PinePhone Pro are 12x6x2 mm. When looking into earpieces not found in this list, aim for these dimensions.
| Earpiece | PinePhone | PinePhone Pro | Where to Buy |
|---|---|---|---|
| LG K8 2017 M200N | Kind of ¹ | Broken | Replace Base |
| Nokia 5 | Works | Works | Replace Base |
| Nokia 7 | Works ² | Works ² | Replace Base |
| Nokia X5 | Works | Works | Replace Base |
| OnePlus One | Works | Works | iFixit, Replace Base |
| OnePlus X | Works | Works | Replace Base |
| PinePhone | Works | Works | |
| Xiaomi Mi A1 | Works | Works | Replace Base |
| Xiaomi Redmi Note 4 | Works | Works | Replace Base |
Notes:
¹ The earpiece is too thin, it can work with padding to keep the contacts together.
² Audio playback is very low quality.
Incompatible earpieces
The following devices are known to have replacement earpieces with dimensions too large to fit inside the PinePhone or PinePhone Pro.
- Blackberry Classic Q20
- HTC Desire 500
- HTC M10
- Huawei Honor 7A
- Huawei Mate 10 Pro
- Huawei Y7 Prime 2018
- OnePlus 2
- Oppo Reno 5 4G
- Sony Xperia X Compact
- Sony Xperia XA1 Ultra
- Sony Xperia XP X Performance
- Sony Xperia XZ
Camera
The PinePhone Pro has two cameras, Sony IMX258 with 13MP as rear camera and OmniVision OV8858 with 8MP as front-facing camera.

Example picture taken on the PinePhone’s (not Pro) rear camera by Martijn Braam using his app Megapixels.
As mentioned in Software State, the cameras are work-in-progress, including a required DTS fix, userspace still needs to do some catching up and there is a green image tint. This article explains how to fix camera sofware on your PinePhone Pro. The work is on progress and will be available soon for different distributions. Make sure your PinePhone Pro is connected to the web to download needed software.
Arch Linux ARM + Phosh Installation
Open terminal and update your system:
$ sudo pacman -Syyuu
Remove original Megapixels app:
$ sudo pacman -Rns megapixels
Install camera dependencies:
$ sudo pacman -Syu gst-plugin-libcamera libcamera-tools pipewire-libcamera
Install flatpak software manager:
$ sudo pacman -S flatpak
Install Megapixels2 app:
$ flatpak install https://flatpak.brixit.nl/megapixels2.flatpakref --user
You will be prompted to some options
- Should the remote be kept for future installations? [Y/n]: n
- Configure this as new remote ‘flathub’ [Y/n]: y
- Required runtime for me.gapixels.Megapixels/aarch64/master (runtime/org.gnome.Platform/aarch64/47) found in remote flathub. Do you want to install it? [Y/n]: y
To launch camera app you can both click on Megapixels icon on your desktop or enter into terminal following command
$ flatpak run me.gapixels.Megapixels
In case you need to reinstall Megapixels2
$ flatpak list
$ flatpak uninstall --delete-data me.gapixels.Megapixels
$ flatpak uninstall --unused
$ flatpak repair
Green Tint Issue
To fix the green tint issue during post processing of your pictures, add “-a” and “-f” to dcraw line (about #82) into postprocess.sh file
First look for postprocess.sh file:
$ cd ../..
$ sudo find / -type f -name postprocess.sh
Goto the postprocess.sh directory you found using the above command. Here the example /var/lib/flatpak/app/me.gapixels.Megapixels/aarch64/master/[…]/files/share/megapixels/postprocess.sh is used:
$ cd /var/lib/flatpak/app/me.gapixels.Megapixels/aarch64/master/[...]/files/share/megapixels
Backup original file and add “-a” and “-f” to dcraw line, using replace command:
$ sudo cp postprocess.sh postprocess.sh.bk
$ sudo sed -i 's/$DCRAW +M -H 4 -o 1 -q 3 -T "$@" "$MAIN_PICTURE.dng"/$DCRAW +M -H 4 -o 1 -q 3 -T -a -f "$@" "$MAIN_PICTURE.dng"/' postprocess.sh
Further details regarding the camera and the Megapixels camera app can be found on Martijn’s blog.
Factory tests
Battery charging
Download:
- Direct download from pine64.org (722MB, for 8GB microSD cards or bigger, MD5 of the GZip file 214e063c8205c1a98d44b2015a21bb5d)
Instructions:
- Download the build, extract the image and dd it to a 8 GB or larger microSD card, takes out the PinePhone Pro Explorer Edition then insert it into microSD slot (upper slot).
- Insert battery, press RE button (bypass SPI and eMMC boot) while plug in USB-C power. After 3 seconds release RE button.
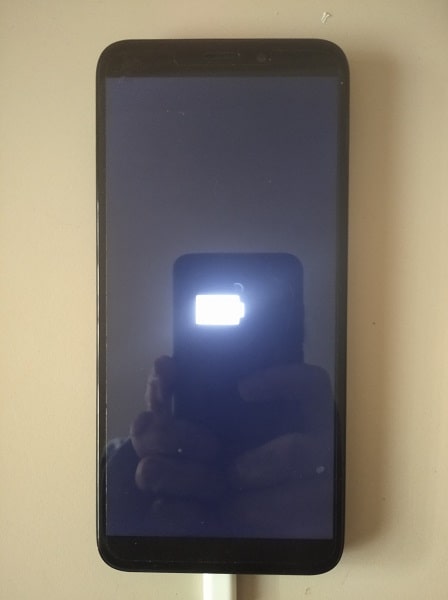
- When power up, below battery icon screen show up and battery will start charging.
- The battery icon display for few seconds and then LCD panel turn off while charging. To check charging status, just quick press power button (about 0.5 second) and battery icon will display progress.
Hardware checking
Download:
- Direct download from pine64.org (722MB, for 8GB microSD cards or bigger, MD5 of the GZip file 214e063c8205c1a98d44b2015a21bb5d)
Instructions:
- Download the build, extract the image and dd it to a 8 GB or larger microSD card, take out the PinePhone Pro Explorer Edition, then insert it into microSD slot (upper slot).
- Insert battery, press the RE button (bypass SPI and eMMC boot) underneath the back cover while plugging in the USB-C power. After 3 seconds release the RE button.
- When powering up, a battery icon screen will show up. Press the power key for two seconds, then the Rockchip logo screen shows up.
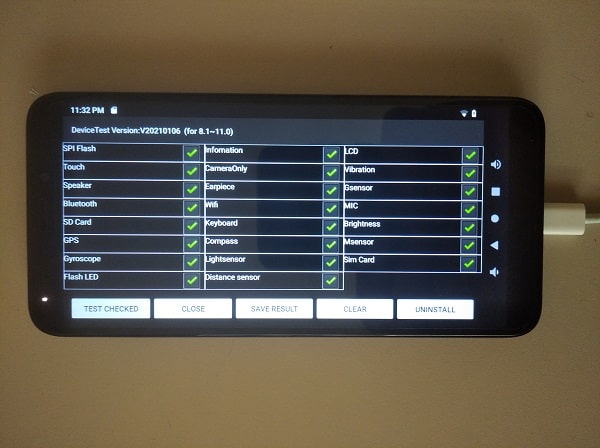
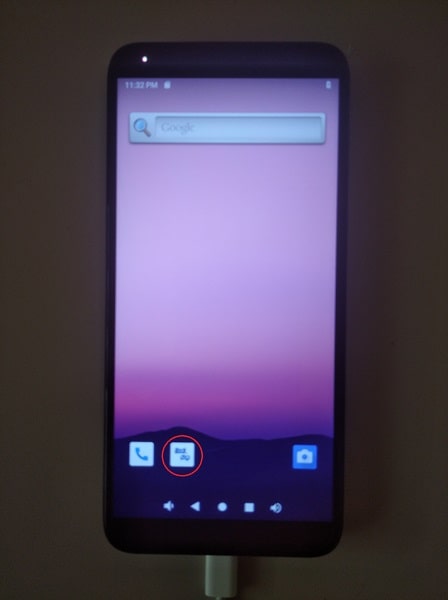
- Wait for the home screen, double tap on the test app icon (mark red circuit) and this will bring up the factory test screen. Please note that the SD test is disabled due in this is SD boot build.
- After running a particular test function, please snapshot the test result and pass it back to support team
Notes:
- Please insert a functional SIM card when performing the SIM test
- When perform GPS test, the first result may fail and please ignore this false message.
- For light sensing test, please have a light shine to the PinePhone Pro when performing the test.
Revisions
- Developer Edition
- Explorer Edition
Developer Edition
The Developer Edition was the first edition of the PinePhone Pro, shipped to developers in December 2021. The aim of the the Developer Edition was to give development community access to the hardware prior to end-users, boost development efforts and allow for porting of existing mobile Linux operating systems to the new hardware. It featured a factory test installation of AOSP as pre-installed operating system and was shipped with the packaging and manual of the succeeding Explorer Edition.
Getting started
This documentation page is strictly aimed at developers receiving their PinePhone Pro dev units. Please note that the following instructions do not apply to Explorer Edition or other future editions of the PinePhone Pro - everything below is only pertinent to the dev phones.
Consider this a crash course rather than a comprehensive overview; you are also welcome to participate in documenting the process (and everything else related to the PinePhone Pro) on the documentation.
Getting the hardware ready
After unpacking the PinePhone Pro from its box, detach the back cover (looking at the back of the phone, there is a fingernail notch on the left leading edge) and remove the plastic tab between the battery and mainboard. You can also flip the headphone jack privacy switch at this point - this enables UART output via the headphone jack. Serial console works the same way as on the original PinePhone.
Factory hardware test image
The PinePhone Pro developer edition ships with a BSP AOSP factory image flashed to the eMMC. This image includes a number of factory applications meant to validate operation of the sensors, the modem, cameras, LCD & touch panel, etc. You’ll have to nuke the AOSP build to run a Linux installation on the PinePhone Pro. Booting from SD with the AOSP factory build present on eMMC is not possible due to the SoCs native boot order.
Changing the language of factory AOSP
This is optional and only if you want to test out the AOSP test image.
- Swipe up from the bottom of the screen.
- Tap on the Gear icon.
- Tap on the 2nd from last option that has an i inside of a circle icon.
- Tap on the first choice with the globe icon.
- Tap on the first choice with the language icon.
- Tap on the second choice to add another language.
- Tap on your language in the list.
- If there is a secondary choice required, tap on the preferred country.
- Tap the four horizontal bars icon to the right of the new second language and drag to the top of the list to set the new language as the default.
Backing up the factory AOSP
It may be a good idea to create an image of the eMMC in case you want to flash it back. Free up at least 117GB of disk space. Install adb.
adb root && adb pull /dev/block/mmcblk1 ~/pinephonepro-factory-AOSP.img
Nuking the factory AOSP installation
To be able to boot from the microSD card easily it is recommend to wipe the bootloader from the pre-installed operating system on the eMMC due to the eMMC being higher in the boot priority than the microSD card.
Method 1: Via ADB
In the factory test image, navigate to setting (gear icon) > at the very bottom of the settings list you will find a phone icon with rk3999mid written underneath it > tap the last (bottom) setting 7 times in quick succession. Following this, you may need to do the following: open the Settings application and enable USB debugging in Settings > System > Developer Options > USB debugging. Then connect the PinePhone Pro to your PC with the supplied USB-C cable.
Please note: It is recommended to charge the device to at least 50% before proceeding with wiping the eMMC.
Connect the phone to your computer and check adb devices in the terminal. The phone should be registered as attached. If the device doesn’t show you may want to try a different port or cable. Then enter adb shell followed by su to gain root access. At this point you can erase the eMMC installation:
cat /dev/zero > /dev/block/mmcblk1
The phone will freeze and then the screen will go blank. Let it sit for no less than 10 minutes and then power it off by holding down the power button. You’ll know the phone is powered down when the notification LED turns off.
Method 2: Via serial cable
Another method of erasing the image is to connect serial console, break into U-Boot when it says to press Ctrl-C, and then the “mmc erase” command can be used to zero blocks on the eMMC. For example, “mmc erase 0 16384” will zero the first 8MB, and is enough to stop it from being bootable. The baud rate for the serial console is 1500000.
Flashing Linux
You will want to do all your testing and development on a SD card; you DO NOT want to flash an OS to eMMC at this time. Builds frequently break at this early development stage and recovering from a corrupted eMMC installation is presently time consuming and tedious. A fast 16-64GB micro SD card for $15 will work just fine.
There are a handful of OS builds available for the PinePhone Pro already. These can be found under the Software Releases section.
If you are a developer porting your own distribution to the PinePhone Pro, please make sure to make an entry for it in the Software Releases section on the documentation. If you want / need help with entering your build onto the documentation please ping one of the mods or admins in the chats (see Forums and Chats drop-down menu).
Resources
Aside from the PINE64 documentation there are also other useful resources scattered across different Wikis, repositories and blogs. In time these will be gathered into one place - the DevZone - which will help to streamline the development process.
At the time of publishing, these are some of the notable resource, listed in no particular order:
Development
This page documents development processes and provides links to resources to help prospective contributors get started. For an overview of the current software state see software state.
Upstreaming status
| Function | Status | Component | Notes |
|---|---|---|---|
| Bootloader (u-boot) | Working. Not upstreamed. | https://github.com/dreemurrs-embedded/Pine64-Arch/tree/master/PKGBUILDS/pine64/uboot-pinephonepro uses https://git.sr.ht/~martijnbraam/u-boot. | |
| Modem | Working. Not upstreamed. | Support in https://gitlab.com/mobian1/devices/eg25-manager and Megi’s kernel. |
Levinboot-based kernel development image
This guide will help you get a comfortable environment for testing your kernel builds on Pinephone Pro. It assumes you either already know how to build or cross-build a Linux kernel for arm64, or if you have a way to get a pre-built kernel from somewhere. For a quick test that your setup works, you can use megi’s pre-built kernels.
Quick and easy way to get started with kernel development and testing is to use CrystalGamma’s Levinboot patched with support for Pinephone Pro and 3-option boot selection using volume keys. You will be able to switch between kernels quickly without swapping uSD cards, which is necessary for painless kernel development experience.
- Create a following partitioning scheme on a uSD card using
sfdisk:
label: gpt
first-lba: 64
table-length: 8

start=64, size=8128, type=D7B1F817-AA75-2F4F-830D-84818A145370, name="sd-lboot"
size=60M, type=E5AB07A0-8E5E-46F6-9CE8-41A518929B7C, name="sd-lpayload1"
size=60M, type=5f04b556-c920-4b6d-bd77-804efe6fae01, name="sd-lpayload2"
size=60M, type=c195cc59-d766-4b78-813f-a0e1519099d8, name="sd-lpayload3"
size=14G name="sd-rootfs1"
name="sd-rootfs2"
This can either be done interactively, or by saving the above to a file, like format.txt, and running sfdisk /dev/<sdcard> < format.txt
Write Levinboot to
sd-lbootpartition usingdd. You can get a pre-built and tested version here There are two optionslevinboot-sd.imgandlevinboot-emmc.imgyou can use either one of them for yoursd-lbootpartition. They differ in where they load the payloads from (either from SD or eMMC) and not in where they can be flashed to. For uSD card only workflow, you’ll wantlevinboot-sd.img.Prepare payloads for Levinboot and copy them to appropriate partitions. Partition
sd-lpayload1is used by default,sd-lpayload2when you hold a volume down key during powerup, andsd-lpayload3when you hold the volume up key.
Preparing a payload involves getting a TF-A bl31.elf build, kernel Image build, DTB file for Pinephone Pro, and optionally an initramfs archive, modifying DTB to include kernel boot arguments, and compressing these using lz4 in specific order, as shown below.
BOOTOPTS=(
        console=tty1

    earlycon=uart8250,mmio32,0xff1a0000
    console=ttyS2,1500000n8

    root=PARTLABEL=emmc-rootfs1
    rootfstype=f2fs
    rootflags=fastboot
    rootwait
    rw

    loglevel=7
)

BOOTOPTS="${BOOTOPTS[@]}"
ALGO="lz4 -zc"

cp -f rk3399-pinephone-pro.dtb board-cfg.dtb
fdtput -pt s board-cfg.dtb /chosen bootargs "$BOOTOPTS"

(
        $ALGO bl31.elf
        $ALGO board-cfg.dtb
        $ALGO Image
.       $ALGO initramfs.img
) > payload.img

dd if=payload.img of=/dev/disk/by-partlabel/sd-lpayload1 bs=4M oflag=direct
Prepare root filesystem. You can use any Linux distribution for aarch64 for development. For example if you want to use Arch Linux ARM, you would need to format the
sd-rootfs1partition withf2fsfilesystem and extract the Arch Linux ARM rootfs tarball there. That will give you a bootable SD card image for Pinephone Pro.Repeat steps 3 and 4 if you want either more kernel payloads, or more Linux distributions on the same uSD card. I recommend having at least some module-less working kernel in
sd-payload3and perhaps a small userspace insd-rootfs1with a pre-configured WiFi connection, that will allow you to always quickly recover if your development kernel fails to boot, just by pressing volume up key during boot and updating the the kernel in one of the primary payload partitions over WiFi.
Resources
Further information
Datasheets, schematics and certifications
PinePhone Pro mainboard schematic:
- PinePhone Pro mainboard Explorer Edition Released Schematic ver 1.0 20211127
- PinePhone Pro mainboard Explorer Edition component top placement ver 1.0 20211127
- PinePhone Pro mainboard Explorer Edition component bottom placement ver 1.0 20211127
PinePhone Pro USB-C small board schematic:
- TBD
Certifications:
- PinePhone Pro FCC Certificate
- PinePhone Pro SAR Evaluation Report
- PinePhone Pro CE RED Certificate
- PinePhone Pro ROHS Test Report
Press
For an overview about media of the PinePhone Pro you can use for the news, blogs, or similar see Press.
Specifications
- Dimensions: 160.8 x 76.6 x 11.1mm
- Weight: Approx. 220g
- SIM Card: Nano-SIM (Micro-SIM before 07/2022)
- Display:
- Size: 6 inches (151mm) diagonal
- Type: 1440 x 720 in-cell IPS with Gorilla Glass 4™
- Resolution: 1440x720, 18:9 ratio
- System on Chip: Rockchip RK3399S 64bit SoC – 2x A72 and 4x A53 CPU cores @ 1.5GHz
- RAM: 4GB LPDDR4 @ 800MHz
- Internal Storage: 128GB eMMC, extendable up to 2TB via microSD, supports SDHC and SDXC
- NOR Flash: Listed as [GigaDevices] GD25LQ128EWIGR, but physical inspection found a SiliconKaiser SK25LP128.
- Back Camera: 13MP Sony IMX258 with Gorilla Glass 4™ protective layer, LED Flash
- Front Camera: 8MP, OmniVision OV8858 front-facing camera
- Sound: Loudspeaker, 3.5mm jack & mic (jack doubles as hardware UART if hardware switch 6 is deactivated)
- Communication:
- Modem Quectel EG25-G
- LTE-FDD: B1, B2, B3, B4, B5, B7, B8, B12, B13, B18, B19, B20, B25, B26, B28
- LTE-TDD: B38, B39, B40, B41
- WCDMA: B1, B2, B4, B5, B6, B8, B19
- GSM: B2, B3, B5, B8 (850, 900, 1800, 1900 MHz)
- WLAN & Bluetooth: Wi-Fi 802.11AC, hotspot capable + Bluetooth V5.0
- GNSS: GPS/GLONASS/BeiDou/Galileo/QZSS, with A-GPS
- Sensors: Accelerometer, gyroscope, proximity, ambient light, compass
- Privacy switches: Modem, WiFi & Bluetooth, Microphone, Cameras
- Battery: Lithium-ion, rated capacity 2800mAh (10.64Wh), typical capacity 3000mAh (11.40Wh) (nominally replaceable with any Samsung J7 form-factor battery; unglue bottom black plastic with your nail from Samsung battery before installation in order to match the dimensions)
- I/O: USB Type-C, USB Host, DisplayPort Alternate Mode output, 15W 5V 3A Quick Charge, follows USB PD specification